Portraiture doesn't have to mean studios – an environmental context can add depth and character. Matt Golowczynski explains
All images by Matt Golowczynski
When most photographers think of portraiture, one of the first things they think about is choosing an appropriate lens. A prime lens, with a moderate focal length and a wide aperture, helps to deliver what most people want from a portrait; namely a natural rendition of the subject, free from distortion and with a pleasingly defocused background. It does, however, also mean the subject is often decontextualised from their surroundings.
Environmental portraiture takes the opposite approach. By purposefully making the subject’s vicinity a part of the shot, such images can be used to reveal much more about a subject. Furthermore, because they break free from the rules of conventional portraiture, they can be used to craft more interesting and unique results. Here are some tips to get you started…
Definition
The whole idea behind environmental portraiture is that there is a connection between the subject and their surroundings. This could mean we see them at their workplace, out on the street, at home or somewhere else. So you might place a farmer in a field for example, or a mechanic in a garage, or a sportsperson on a playing field.
Most environmental portraits will show a single subject, rather than a group of people. The majority are also the result of co-operation between the subject and photographer, rather than candid snaps taken more spontaneously, although there are many examples of the latter that would certainly fall into this category.
Indeed, you could argue that a more candid capture will produce a more faithful representation of the subject in their environment, rather than one in which they are asked to pose or where there is some other type of direction from the photographer.

When trying to capture a subject at work, consider what props best explain what they do for a living. In such a scene, it’s important to make sure the prop is large and visible enough for its purpose to be obvious.
Equipment
Given that so much is possible within environmental portraiture, the range of suitable equipment is broad.
There’s no reason why you can't use a compact camera or even a smartphone, although a DSLR, compact system camera or even medium format model will provide the added flexibility of interchangeable lenses alongside other advantages.
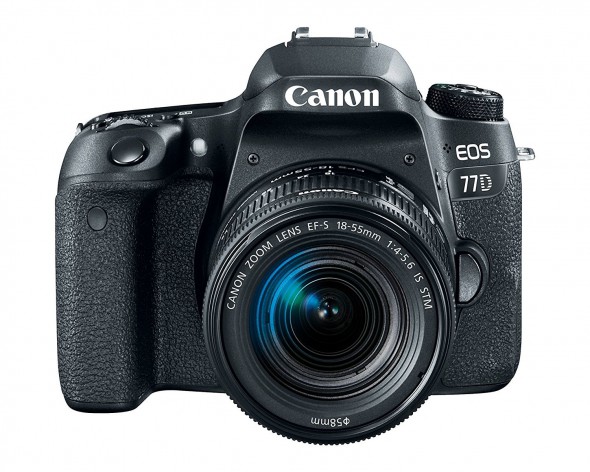
The new Canon EOS 77D is an ideal camera for this sort of work
It’s certainly possible to use the same kinds of lenses as you would for conventional portraits, although something a little wider than what would usually be considered for a portrait will allow you to capture more of the environment around the subject.
A lens with a wide maximum aperture can be very useful for environmental portraiture. This is partly down to the fact that you may well be shooting indoors where light may be less abundant, but also because, for the purpose of creativity, you may not necessarily want to capture everything sharply.
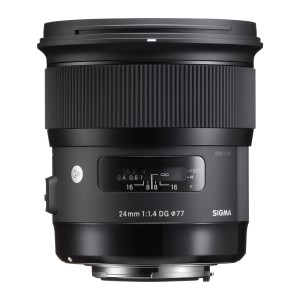
Sigma 24mm f1.4 DG HSM Art Lens
A chef working in a kitchen, for example, or a mechanic in a garage may be dressed sufficiently enough to make their immediate environment obvious, even if you choose to use a wider aperture and render these areas out of focus.
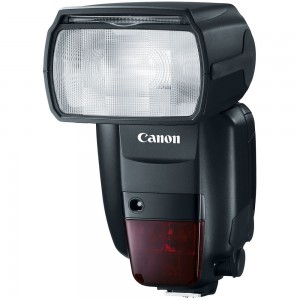
Canon Speedlite 600EX II-RT Flashgun
Flash or other artificial lighting is also commonly used for environmental portraiture, both when there’s a lot of the surrounding environment that you want to get into the frame and when you’re trying to highlight particular key elements over others. This is particularly useful when capturing athletes or sportspeople, where there may be a track, pitch or other sporting detail in the background.

It’s worth getting hold of some inexpensive reflectors
Naturally, you may also want to use anything else you may typically rely upon for a conventional portrait, such as lighting modifiers, reflectors and so on.
Technique
It’s a good idea to communicate exactly kind of thing you have in mind with your subjects prior to starting the shoot. Not only does this help them to understand exactly what will be required, but they may also have some valid contributions to make.
They might suggest some good locations or props, or offer to bring a change of clothes to see whether a different uniform or outfit works better in a chosen scene. They may also be able to enlist the help of others, which is useful if you don’t have an assistant and you need someone to hold a reflector or another accessory while you shoot. For outdoor portraits where there may be changes of clothes involved, such a person may be able to look after bags, coats and props.
Perhaps the hardest thing to get right with environmental portraiture is balance between your subject and surroundings. The best images reveal enough about both to make it work as an environmental portrait, but there are a number of things to consider if it’s to be successful.
First, if you’re using a wide-angle lens with the intention of getting plenty of the environment into the frame, make sure that this does not come at the expense of the subject itself. While a subject dominating the frame may mean you lose the context that the environment is supposed to provide, an overly wide shot may render your subject too small to stand out.
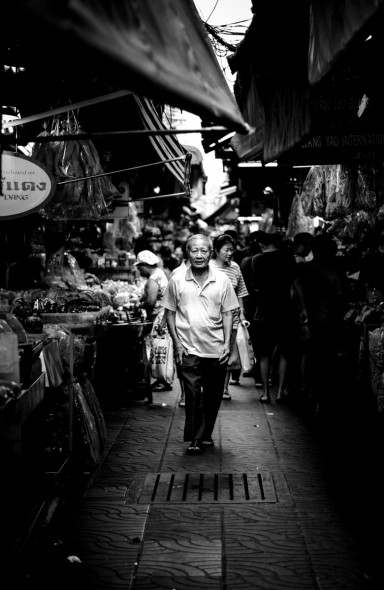
Although a relatively wide lens was used for this capture, slight cropping combined with vignetting places more emphasis on the subject while maintaining enough detail in the surrounding area to show that this is a marketplace.
The same also applies with depth of field, and this is particularly something to bear in mind when shooting close to your subject at a wide aperture. While you should not shy away from experimenting, a background that’s too out of focus may obscure too much.
Also, you should be careful where in the frame you position your subject and how far away they are from the camera. A subject positioned too close to the camera could end up too distorted.
Similarly, a subject positioned too close to the edge of the frame when using a wide-angle lens may fall victim to a type of stretching known as volume anamorphosis, which looks very unflattering.
For best results, try to position the subject no further than two-thirds of the way towards one side of the frame and go from there. If you’re using a lens with a longer focal length, you may be able to get away with more extreme positioning.
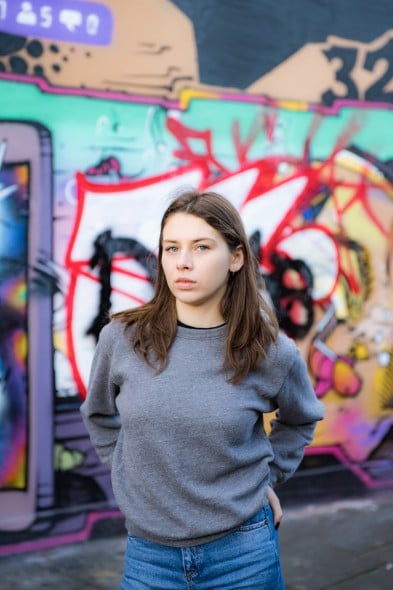
Colour can play a vital role in explaining the environment, and can elevate a subject that may be wearing more neutral clothing.
In the same way that not all conventional portraits depict the subject looking towards the camera, there are no rules to suggest this has to be the case with environmental portraiture (even if this does tend to be more common).
A barman, for example, could be backed by rows of spirits bottles if posed for context, or could be captured making a drink if you want to something more candid. You may want to stick to one format, but in this situation there’d be no reason why you couldn’t capture both and then decide on which image works best (or which images work together).
Ultimately, as with much of photography, you’re likely to find a little trial and error is what’s needed. If it’s possible, consider shooting tethered to a computer or tablet. The larger display will allow you to scrutinise your images closely, meaning you’ll be able to tell more easily what adjustments you need to make to settings, lighting or subject position.


Your subject doesn’t necessarily need to be looking at the camera, but you should be careful not to place greater focus elsewhere in the scene. Here, the portrait-orientation shot is a stronger environmental portrait than the other as the subject remains in focus.
Post-processing
Post processing can be used to great effect when it comes to environmental portraiture, helping you to underline the relationship between your subject and their surroundings.
Vignetting, for example, can be used to place more emphasis on your subject, while dodging the subject or burning the surrounding details a little can also make them more prominent.
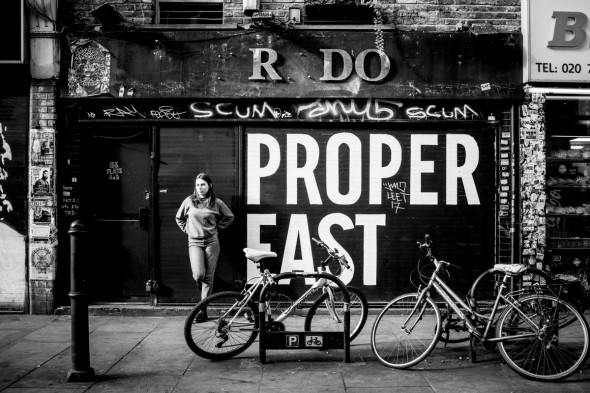
A brash environment may be accentuated with a harsher treatment with regards to contrast and colour. Look again at the image from the top of this post, for example, where a high-contrast, black-and-white treatment places more emphasis on the gritty nature of the area, such as the graffiti and posters:
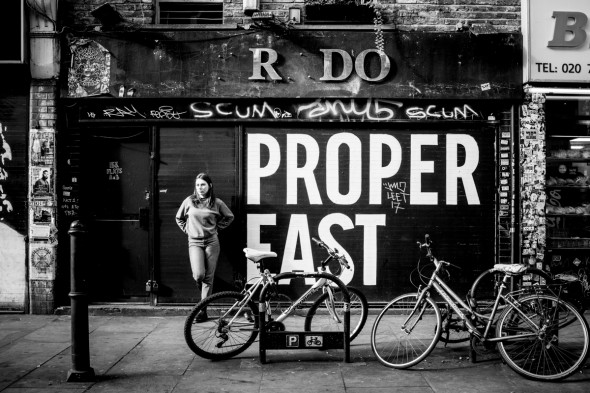
Bear in mind that what works for a standard portrait may not necessarily work for an environmental one when it comes to post-processing. While it’s still worth trying to flatter the subject by cloning away stray hairs and so on, you should try to ensure that your editing does not in any way weaken the environment itself.
For example, if you’re planning on editing your images in black and white or sepia, make sure that the process does not remove important details in the scene – otherwise, it may give too little of an idea of what the scene actually is. If in doubt, simply capture your images in Raw format so that you have a colour copy.
Interested in learning more about portraiture? Watch our video series with pro portrait photographer Hannah Couzens
About the Author
Matt Golowczynski is a London-based photographer and technical journalist who has written for a range of print and online magazines. For more information and to see more of his work visit his website.
Related articles
Focus on Family Portraits
Three Creative Ways to Light a Subject
Three Spectacular One-Light Portrait Setups