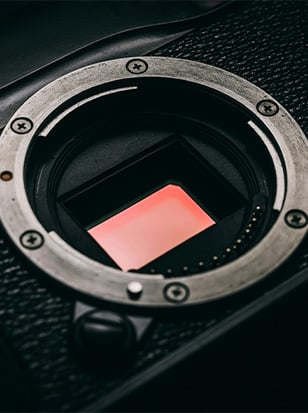
Have you noticed black spots or soft grey blobs and marks on your photos, especially those taken on clear, sunny days? These spots could indicate a dirty sensor. It could be dust, hair, dirt or other particles. These marks on a sensor can go unnoticed for a while, particularly if you shoot with a wide aperture. But when you eventually stop down for a shot, the particles can become a lot clearer which can ruin your images, especially for professional shoots.
In this guide, we’ll cover some best practices for identifying a dirty sensor and how you can attempt to clean it yourself. However, cleaning your camera sensor can be delicate work. You should proceed with extreme caution to avoid damaging your sensor, which could lead to costly repairs.
We’d recommend visiting one of our stores across the country or visiting our sister company Fixation UK for professional cleaning services. But, if you can't reach a professional, need a quick fix or would like to clean your sensor at home, here are a few options.
Quick fixes
Use in-camera cleaning: Most cameras have an in-camera cleaning option that uses vibrations to dislodge dust. If there’s just some light dust, this will make your life easier in the long run. Try this first.
Shoot wide open: If in-camera cleaning doesn't work, shooting at the widest aperture possible can minimise the appearance of dust particles. Most cameras have an in-camera cleaning option that uses vibrations to dislodge dust. If there’s just some light dust, this will make your life easier in the long run. Try this first.
Take extra care: Take care when changing your lens when out and about. Exposing your sensor when changing lenses can introduce more dust or damage your camera’s sensor. But if you must change your lens, you can help reduce the chances of dust by holding your camera with the sensor facing down and using an air blower before attaching the lens.
Identifying a dirty sensor
Before any important assignment, project, holiday or wedding we recommend checking your sensor to see if it needs cleaning to save you from finding out the hard way i.e. after the shoot when it’s too late! Professionals will use a sensor scope which is a safe and effective way of examining image sensors a high magnification and bright LEDs to easily see dust etc. But, if you don’t have one of these, there are a couple of options. You can do a “blue sky test” but blue skies are not always available in the UK. So, what you can do is check your sensor at home with a test shot.
What you’ll need:
- Camera: Any DSLR or mirrorless camera
- Lens: 50mm f1.4 lens (or any standard angle lens)
- Tracing paper or diffusion gel: For creating a blank light source
- Tape: To secure the tracing paper or diffusion gel
- Light source or window: But do not point your camera directly at the sun as this can damage your camera and lens.
- Image editing software: For example, Photoshop or Lightroom
Step 1: Create a blank light source
- Use a lightbox: If you have a lightbox for viewing slides or negatives, use it as your blank light source.
- If not, make one: If you don’t have a lightbox, stick some tracing paper or lighting diffusion gel to a window. This will diffuse the light and create a uniform light source.
- And if all else: Simply find a well-lit neutral-coloured background.
Step 2: Set up your camera
- Lens: Attach a standard angle lens.
- ISO: Set the ISO low so noise is not visible in the test shot e.g. ISO 200.
- Image quality: Set the image quality to JPEG.
- Focus mode: Switch to Manual Focus (MF).
- Mode: Select Aperture Priority mode.
- Aperture: Set the aperture as narrow as it will go e.g. f22.
- Exposure compensation: Set exposure compensation to 0.
Step 3: Take a picture
- Position the camera: Place the lens flat against the lightbox or the tracing paper on the window.
- Take the shot: Keep the camera pressed against the light source while taking the picture. On a gloomy day, the exposure might be around 1/2 second. This will create a silhouette of any dust on your sensor. Since the dust is on the sensor, focus settings won’t matter. If using a neutral-coloured background, take the photo the same way but position the camera further back from the surface.
Step 4: Review your image
- Camera or computer: This can be done by turning the camera back on and reviewing the image on the LCD. However, to be thorough, you should look at the image on a monitor.
- Download the image: Transfer the image to your computer.
- Open in Editing Software: Open the image in your preferred photo editing software (e.g., Photoshop).
- Initial view: Initially, the image will appear grey and flat. Only the most serious dust marks will be visible.
Step 5: Adjust image levels
- Open levels adjustment: In Photoshop, go to Image > Adjustments > Levels.
- Adjust sliders: The image information will be in the central spike of the histogram. Move the black and white point sliders towards the center to increase contrast and highlight the dust.
- Check the image: Any dust on your sensor will now appear as visible black marks.
Cleaning at home
If you’ve identified dust, dirt or marks on your sensor, you can clean your sensor at home using sensor cleaning products like air blowers, microfibre cloths, lens brushes, and cleaning solutions. There are two methods, a dry and a wet. The dry method is perfect for light dusting. For smudges or heavy dusting, a combination of both is ideal. While the wet method is the most effective, it is also the most risky. With that in mind, it’s best to follow the initial steps stated below before moving forward. Remember, always follow your camera manufacturer's instructions for sensor cleaning - it will differ from brand to brand, DSLR to mirrorless.
- Clean your camera: Clean the outside before opening up the inside to reduce the chance of more dust particles entering your sensor.
- Clean your workspace: Make sure your workspace is clean and dust-free.
- Prepare your tools: Be prepared and make sure you have all the necessary cleaning tools before you proceed.
- Charge your battery: Ensure your camera battery is fully charged to prevent shutdown during cleaning, which could damage the sensor.
- Memory card: You will want a memory card in your camera for test shots.
- Automatic cleaning: Most cameras have an automatic clean mode. You should use this feature first to try and remove any light dusting and dirt.
Dry clean
Dry cleaning your sensor is a common practice and one that every photographer can do without too much worry. You’ll want to do this before and after shoots and ideally in between lens changes. By doing this, you can ensure your sensor is generally free of loose debris and particles.- Air blower: An air blower is a non-toxic, environmentally friendly of removing dust and other particulates from your sensor. Never use compressed air as this can damage the sensor.
- Lens pens: These are specifically designed to clean optical equipment including lenses and sensors. We would recommend the LensPen Original as it’s effective, compact and has a retractable brush.
- Sensor scope or test shots: Either use a sensor scope of the test show method to identify dust after cleaning.
Step 1: Hold your camera with its sensor exposed, facing down. Make sure you don’t touch anything as you clean.
Step 2: Using your air blower, gently blow air onto and around the sensor (and the back of the lens if you’re cleaning that too) to dislodge loose particles. Holding your camera facing down helps reduce the chance of particles floating around the inside of the camera, helping them to be blown out. Never use canned or compressed air. You can also use a lens pen to brush away more obvious particles.
Step 3: Either use your sensor scope or the sensor test shown above to see if the dust has been removed.
Step 4: Repeat the process with the aіr blоwеr until all spots have been removed. This method will often be enough to clear most dust or dirt from your sensor. But for more stubborn marks, you’ll need a wet clean.
Wet clean
A dry clean will often be enough to clear most dust or dirt from your sensor. But for more stubborn marks, you’ll need a wet clean. A wet clean should be performed after removing as much dust/debris as possible with the dry clean method. This is a very delicate process and if you’re not confident, it is best to seek professional advice.
- Sensor-cleaning swab: These swabs are generally made from highly absorbency fabric that is made of super soft thin fibres that will not damage your sensor. There are various brands but we’d suggest Visible Dust.
- Lens-cleaning solution: There are several types and it is best to seek professional advice before using but, generally, lens cleaning solution is designed to clean away water and most oil stains without leaving streaks or residue.
Step 1: Moisten the edge of the swab with two drops of cleaning solution.
Step 2: Drag the swab across the sensor in one pass, then back the other way using the other edge. Repeat if necessary. Note: do not apply too much pressure as this can damage the sensor. Only use each side of the swab once, then dispose of the swab. Reusing the swab will potentially smear dirt back onto the sensor, or worse, scratch the sensor.
Step 3: Now, you’ll need to use your sensor scope or take a test shot to ensure the sensor is clean. If dust is still present, use your air blower to see if any remaining dust can be removed. If dust still appears, you’ll need to repeat the wet clean steps with a new swab until the sensor is clean.
Final tips
- It’s okay if there’s some dust on your sensor. In many cases, if you generally use apertures larger than f5.6 most marks will not show clearly in your images. If you regularly use smaller apertures, for example, wildlife or macro work, then you may need to clean your kit more regularly.
- If you photograph all year round, you can probably get away with three wet cleans a year, with regular use of an air blower when switching lenses or putting your kit away. Be proactive with maintenance.
- Keep your bag, case, camera and lenses clean. The cleaner you keep the outside of your kit, the smaller the chance there is of that dirt getting inside your camera.
- If you’re ever worried about cleaning your camera’s sensor, contact us and we can arrange a cleaning service for you. There’s no point in damaging your expensive equipment by using the wrong equipment or method.
Disclaimer: Wex Photo Video cannot be held responsible for any damage to your camera equipment as a result of carrying out any activity outlined in this article. Any cleaning of your camera equipment is entirely at your own risk. You should always seek professional advice if in any doubt.
FAQs
How do I know if my camera sensor needs cleaning?
You might need to clean your camera sensor if you notice spots or dark areas in your photos, especially when using smaller apertures (higher f-stops). These spots are usually more noticeable against clear, uniform backgrounds like the sky. To confirm, you can take a test photo of a white sheet of paper or a clear sky and check for any noticeable spots.
Can I clean my camera sensor myself, or should I take it to a professional?
You can clean your camera sensor yourself if you follow the proper procedures and use the right tools. However, if you are not comfortable doing it or if the sensor has stubborn debris, it’s best to take it to a professional to avoid damaging the sensor.
What are the risks of cleaning a camera sensor myself?
Cleaning a camera sensor yourself carries several risks, including scratching the sensor by using the wrong tools or excessive force; use of low-quality cleaning solutions or techniques that can leave residue or streaks on the sensor; damaging internal components by force or excess liquid; all of which can risk voiding warranty.
What is the difference between wet and dry sensor cleaning methods?
Dry cleaning involves using tools like an air blower or a sensor brush to remove loose dust and particles. It's the first step in sensor cleaning and is less invasive than wet cleaning. Dry cleaning is often sufficient for minor dust removal. Wet cleaning is required for stubborn dust and particles that can’t be removed by the dry method. This method uses sensor cleaning swabs and a cleaning solution to remove more stubborn debris or smudges. Both methods are often used in combination, starting with dry cleaning and moving to wet cleaning if needed.
Sign up for our newsletter today!
- Subscribe for exclusive discounts and special offers
- Receive our monthly content roundups
- Get the latest news and know-how from our experts